What’s up buttercup? The Dessert Pervert is back and proud to report that I am changing it up! Today I am bringing you two different recipes and will compare them with my super picky taste buds, along with some opinions from my fellow wavers. The dish that we will be testing out is Japanese Souffle/Cotton Cheesecake!
I’ve always loved cheesecake recipes and the many variations that come under that name. There’s the famous New York Cheesecake, Oreo Cheesecake, Devil’s Cheesecake, etc. They all follow roughly the same type of recipe with a few ingredient variations. Souffle cheesecakes are very different, compared to normal cheesecake recipes. They require a lot more care because they are a combination of souffle and cheesecake, and souffles are very delicate. Luckily for you, I’ve scoured the internet and found two recipes to put to the test!
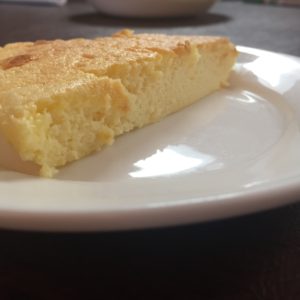
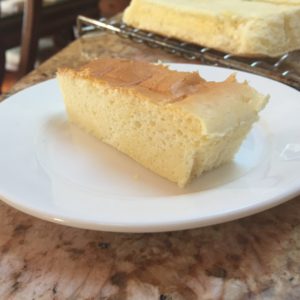
The first recipe is the cheater version of the Souffle Cheesecake. This recipe uses three ingredients to replicate the fluffy texture of a scuffle component, but still has the richness you’d expect from a cheesecake. It is a lot sweeter than the official recipe, but better than I expected.

The second recipe is the official recipe, with all the different ingredients and no shortcuts. This recipe rose a lot more and was somehow a bit more dense despite its fluffier appearance. Appearance-wise, this recipe would win first place; it reminded me of the first souffle cheesecake I had when I was a kid. (But I don’t think it was a real Souffle Cheesecake because I got it from a Ranch 99.)

I couldn’t really tell the difference (on the preparation side) between the official recipe and the cheater recipe. The only noticable discrepancy in making the recipe was the amount of ingredients used. Also, both of these recipes used grams/ml for measurement, so having a scale on hand is recommended (measurements converted from grams to cups are never quite accurate). The main difference in texture is the consistency of the meringues. In the cheater recipe, the meringues weren’t as stable as the official recipe, so for that reason, it wasn’t as fluffy.
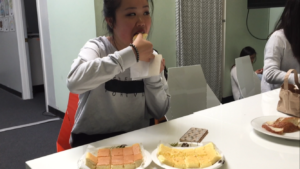
I brought in the two recipes for my fellow wavers to taste and here were their opinions!

“I think I like the original one better. I’ve never had souffle cheesecake before, so I’m not much help! (Chloe is a really good baker)”

“The cheater is very creamy. Such cheese! Very cheese! The original looks a lot fluffier and is golden on top, but taste-wise, I like the first one more. Presentation-wise, the second one wins.”

“The cheater is very dense and moist. It’s less rich and not overpowering with the cheesiness. Mmmmm, the original is a lot lighter. (What else do I say?) Also the texture (or textúre as they say in France). I feel like I could eat the whole tray, but I could only eat one piece of the original because it’s a lot thicker.”

“The cheater is really thick and really good. I crave sweets all the time, so I really like this one. It’s just the cheese part of the cake. This original reminds me of a sponge cake from a bakery near my house, but I like the first one more because it tastes more like the cheese part of a cheesecake.”

“It’s good (the original). I don’t know what to compare it to – haha! It’s a little hard to swallow, but it’s good. I like the cheater better, it’s creamier.”

“I like the cheater more because it’s cheesier.”
So the final tally for the Souffle Cheesecake Battle is … drumroll please … the cheater recipe wins with four votes and the original recipe loses (barely) with three votes. This, of course, depends on your sweet tooth, but try the recipes out and see which one you prefer! Both recipes are quite…

Cheaters’ Recipe:
Ingredients:
-120 grams of white chocolate
-120 grams of cream cheese
-3 eggs
Directions:
- Melt the white chocolate gently over a double boiler. (Put a bowl on top of a pot with an inch of simmering water.)
- Separate the egg yolks from the egg whites.
- Whip egg whites until you get stiff peaks. (Be patient and make sure your mixer and bowls are free from any fat or oils.)
- Soften the cream cheese before adding the white chocolate. Combine until homogenous.
- When the cream cheese mixture is slightly cooler, stir in the egg yolks.
- Fold in the egg whites gently by first introducing a little before folding in the rest. Do in three parts.
- Pour onto a parchment-lined baking tin and put into another baking tray.
- Pour water up to halfway in the larger tray and put into a preheated oven at 180C.
- Bake for 15 minutes before turning temperature down to 160C. Bake for another 15 minutes. Turn off the heat and let it rest in the oven for another 15 minutes.
- Take it out and remove it from the tray. Let it cool for 5 minutes before eating. (PROTIP: IT TASTES GREAT WARM TOO)
Original Recipe:
Ingredients:
-125 grams of cream cheese
-110 grams of whipping cream
-3 egg yolks
-20 grams of caster sugar
-50 grams of cake flour
-20 grams of cornstarch
-1/2 tsp of vanilla extract
-3 egg whites
-50 grams of caster sugar
-1/8 tsp of cream of tartar
Directions:
- Melt together the cream cheese, whipping cream, and 20 grams of caster sugar. Leave aside to cool.
- Whip up egg whites until little bubbles form. Add the cream of tartar and continue beating.
- Slowly incorporate 50 grams of caster sugar in 2 batches. Whip until glossy and stiff peaks.
- Add egg yolks to cooled cream cheese mixture.
- Add vanilla extract.
- Push mixture through sieve to get rid of the possible bits of cooked egg yolk.
- Sieve together the cake flour and cornstarch. Fold in gently to cream cheese mixture.
- Push mixture through sieve again to make it as smooth as possible.
- Introduce egg whites and fold the rest in three batches.
- Pour mixture into a parchment-lined baking tin.
- Set up water bath and put into a preheated oven at 180C. Turn down the heat when you close the oven door to 160C. Bake for 40-60 minutes. (Depends on the intensity of your oven.) If the cheesecake starts to get too brown, put a foil tent over it.
- Turn down the oven temperature to 120C and continue baking for another 20-30 minutes. Turn off the heat and leave the oven door slightly open to let it cool for about 30 minutes.
- Take it out of the oven and remove it from the tin to let it stand.
- Enjoy!
Until next time!


