Welcome back to the loop! In today’s post, we’ll be going over synths and effects. The text that accompanies each screenshot will be underneath the screenshot like a caption. At the end, the song progress will be posted. Let’s continue our journey through the loop.
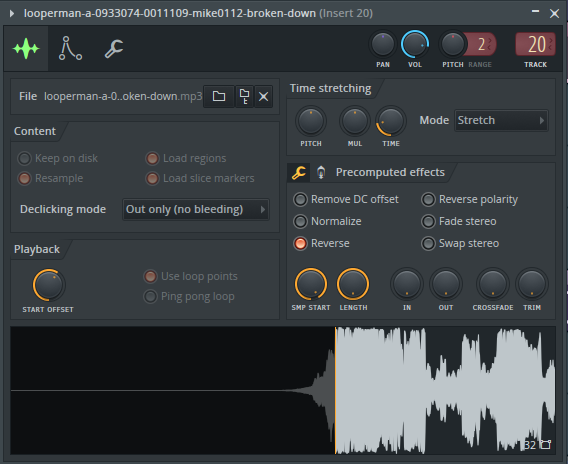
- I found this vocal chop from the song “Broken Down” by Michael Mayo, which is in the same key as my song. I reversed it and used the ending of it for my song. I clipped off a little bit because it didn’t have a rhythm. I also had to stretch the sample so it would fit the BPM (beats per minute) of the song, which is 140. I did that using the time knob under time stretching and set the mode to stretch so it didn’t change the pitch. I also added lots of reverb to the sample. I turned up the wetness and turned down the dryness, which makes mostly the reverb part of the sample audible. I then stereo enhanced the sample, which is the same thing as double tracking. The amount of stereo enhancing depends on how much time is in between the first and second times the sample is played. If there’s more time in between the first and second plays of the sample, there will be more “spread” of the sound. The sample is played twice: one time on the right, and one time on the left.
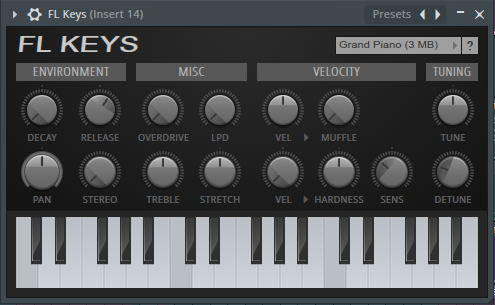
FL Keys settings for my piano sound - In FL Studio, there is a plugin/VST called FL Keys. It has many unique types of piano, including grand, rhodes, electric, et cetera, but I stuck with the default grand piano. The only adjustments I made were to muffle it a little bit with the muffle knob, and make it less sensitive, so there was more power when the keys were hit. The only effect I put on the piano was some stereo enhancement.
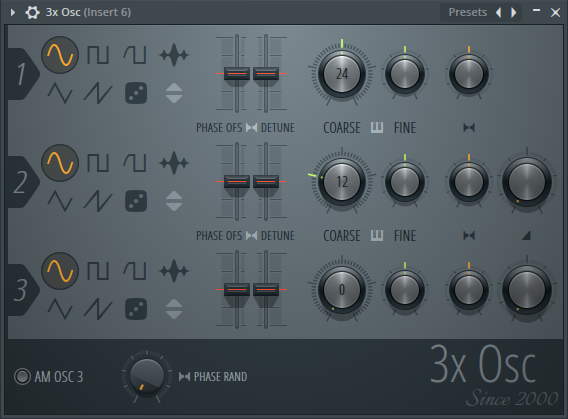
Settings on 3x Osc for a subbass - I use the 3x Osc to make my sub basses (3x Osc means that there are three different oscillators in the plugin). I only use one for the sub; the last two are turned off. I set the wave to a sine wave (the curvy one), and just make the note low. That’s it! There’s your sub. No fancy effects or anything.
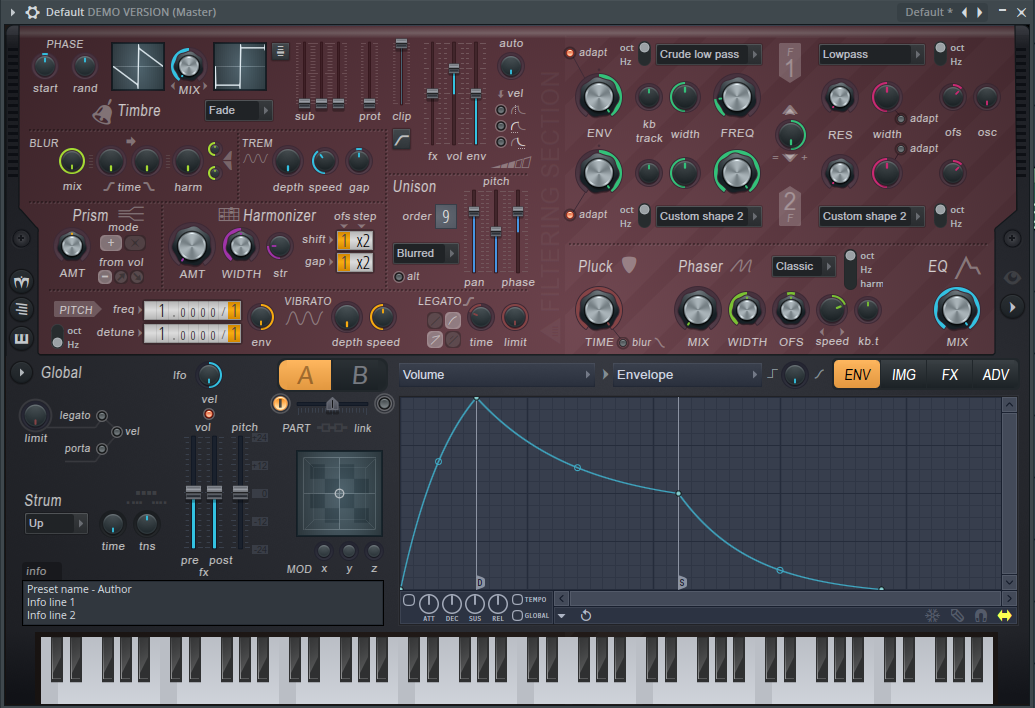
Harmor settings for low frequency chords - These chords are saw waves, as you can see on the top left of the image. The mix is set all the way to the saw (the pointy wave). In the middle, under the “unison” area, the order is set to nine, which is the maximum. This means that, for each note, there are nine different oscillators, which are all slightly detuned from the actual note, to give the synth more depth. The last thing I did to this synth is on the top right; the frequency knob is turned down. What this does is cut off all the high- and mid-frequencies in the synth, so you’re left with only the low ones. It’s like, if you’re outside of a club, you can hear the music, but it’s muffled. Once you enter the club, the highs and mids start to reach your eardrums, and the song isn’t muffled anymore. I also put a lot of stereo enhancement on these chords. Chords sound much better with a lot of it. It gives the song much more depth, so your ears don’t get bored.
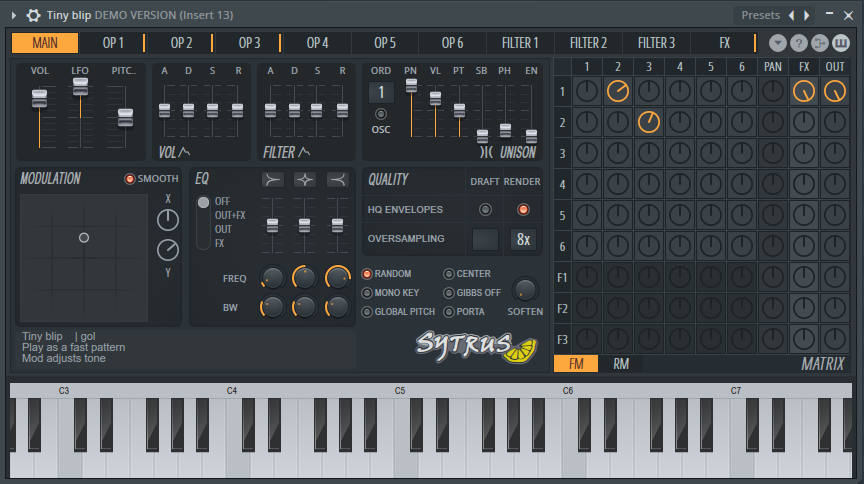
Tiny blip preset in Sytrus - For the main lead in the first part of the song, I used a preset in the plugin Sytrus. It’s called Tiny Blip, because it sounds like a tiny blip. It’s under the plucks section of all the presets. In my opinion, plucks shouldn’t usually be used for slow melodies where notes carry out, because plucks are short spurts of a synth. They don’t last for as long as you want them to. If you make each note shortly after the one before, it’ll sound much better. I added reverb, stereo enhancement, and delay to this synth. Delay is what makes it echo.

Harmor settings for my square wave pluck - This pluck is one I made myself. It’s very simple to recreate; you simply set the mix on the top left of the Harmor plugin to the square wave on the right side, then turn the pluck knob all the way down. I added unison to the pluck, to give it depth. The only other things on it are a little bit of reverb and delay. I didn’t put stereo enhancement on it, so that it would stand out from everything else in the direct middle of your head.
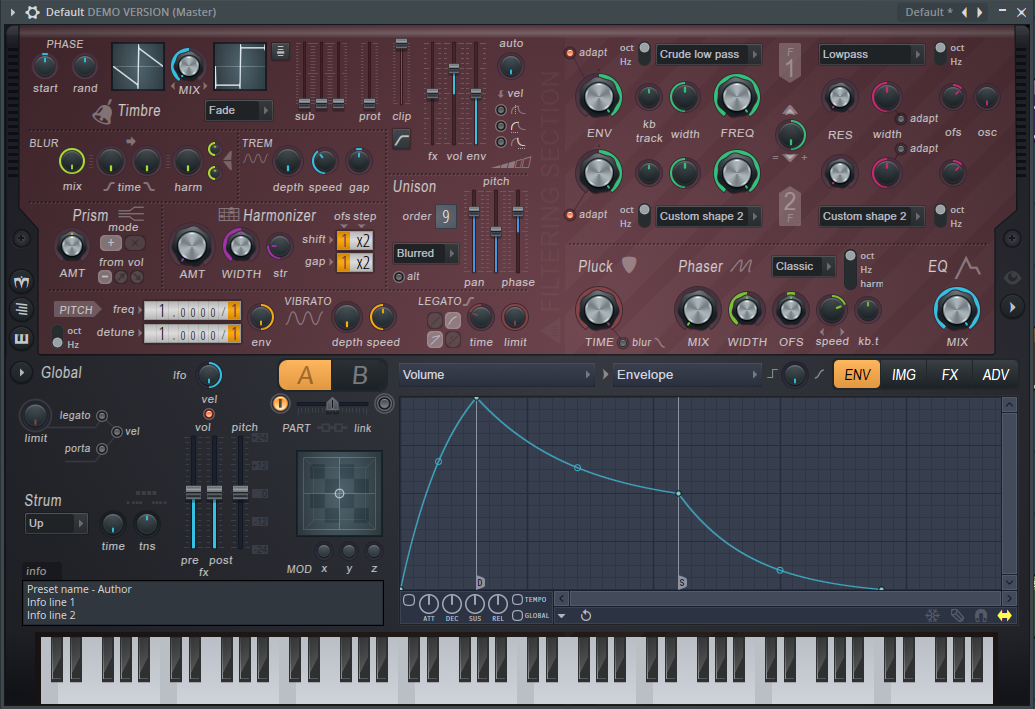
Harmor settings for main chords, melody, and riser 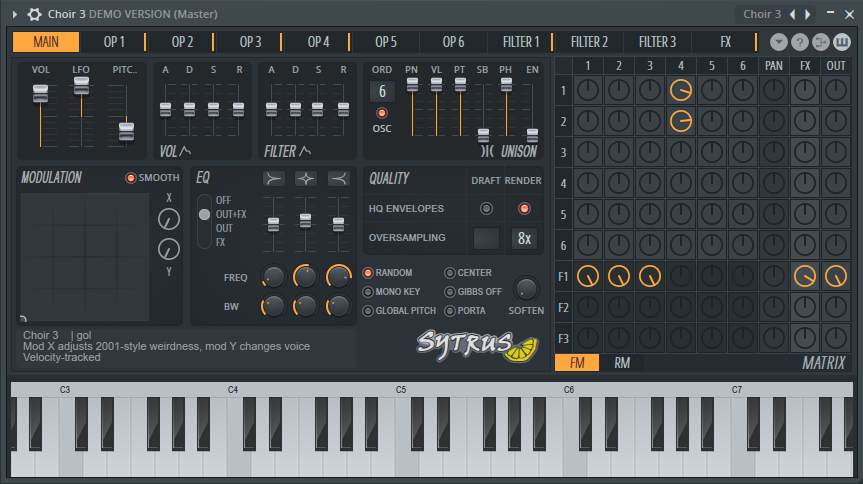
Choir 3 preset in Sytrus - The riser, chords, and melody are all mostly saw waves. To make the synth, you need to have nine voices of unison on the saw wave. There’s also a “Choir 3” preset in Sytrus, which is layered on top; this preset sounds like a human voice singing “Ahhhhhh.” I chose Choir 3 over Choir 1 and 2, because it has very little decay when the note ends, so a chord doesn’t overlap into the next one. The last layer in this synth is a basic sine wave, using 3x Osc. It’s the same thing as the sub bass, but higher. All of these have a lot of stereo enhancement.
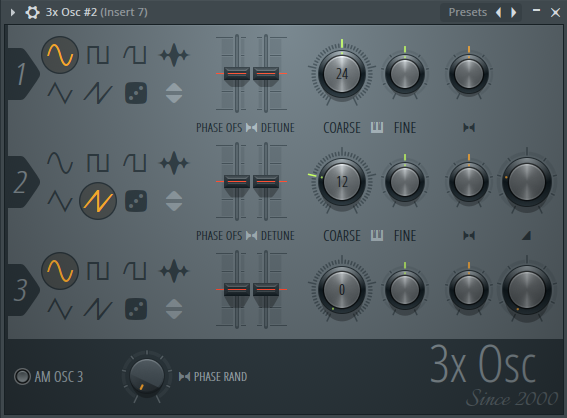
3x Osc settings for the bass drop - The first filler in the chorus in between chords is the bass drop. For the drop, I used the plugin 3x Osc. The first oscillator is a simple sine wave, that’s turned all the way up. The second oscillator is just a saw wave that’s quieter than the sine wave. There are no effects on the drop.

Harmor settings for my filler pluck - For the plucky filler I used the same synth as the square wave pluck I made, but just added a lot of reverb and stereo enhancement. I turned up the decay on the reverb, to make the sound fade out for a longer amount of time.
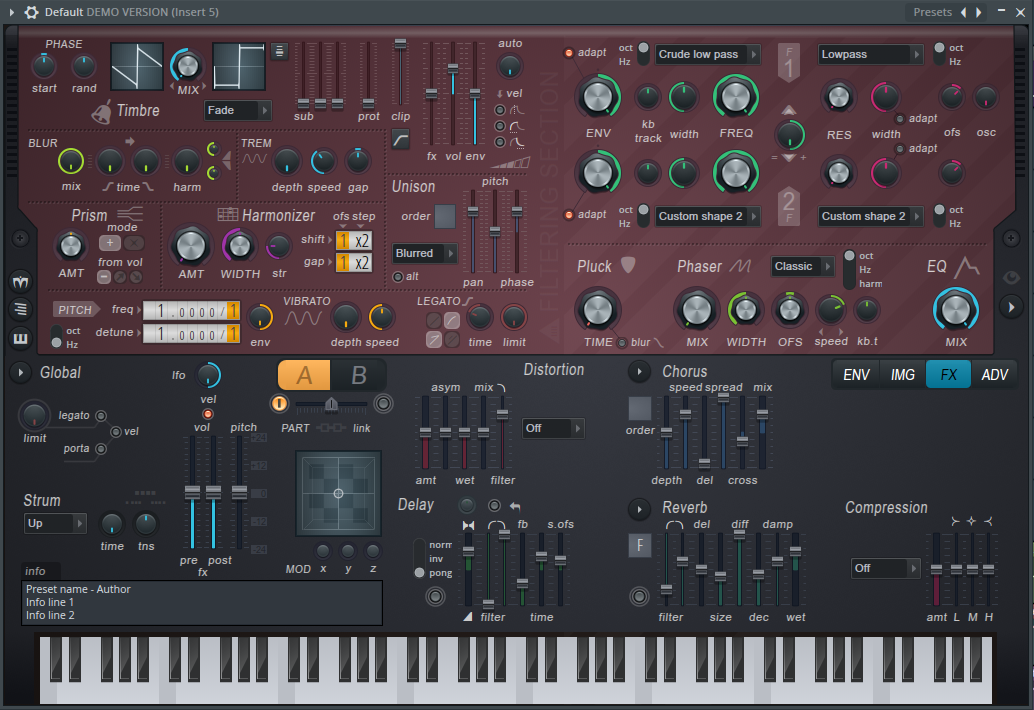
Saw wave pluck before automation 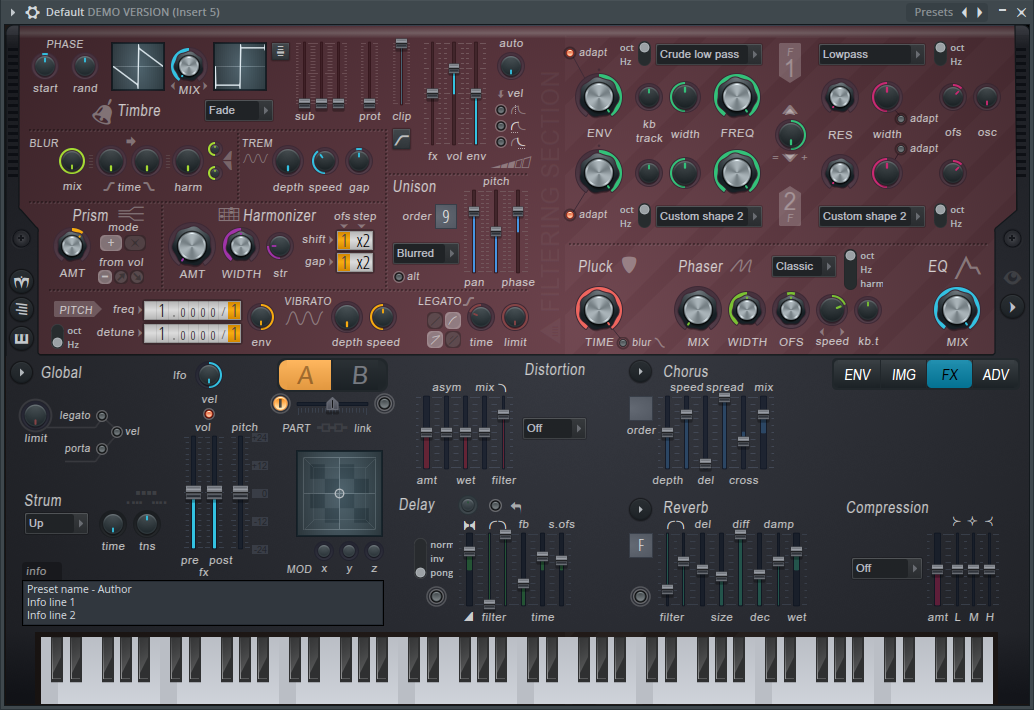
Saw wave pluck after automation - This is a new synth that wasn’t covered in the last post, because it didn’t exist back then. It is a simple saw wave pluck. I automaded the unison so it goes up gradually to the max at one part. The pluck is also automated with the unison from pluck to no pluck. There are no effects on this synth.
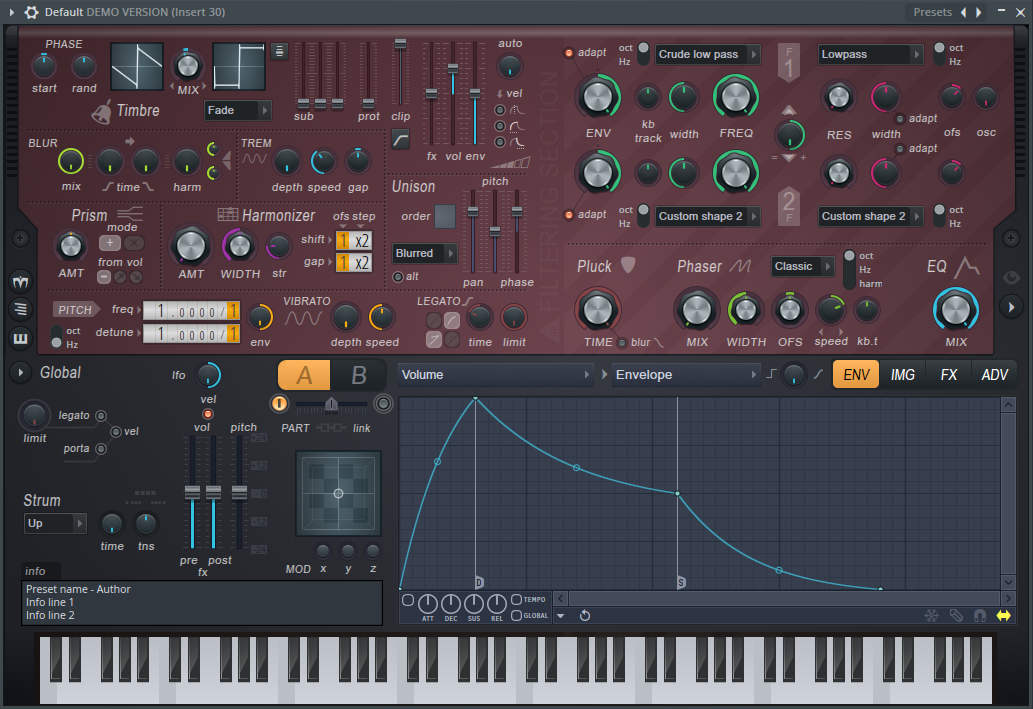
Harmor settings for the arp - The last thing I’ll be covering is another synth that didn’t exist in the last post. It is a simple arpeggio, or arp for short. An arpeggio is a series of notes in a chord that are played in succession. The arp quickly climbs up each chord.
As you can hopefully see, notes aren’t the only thing that goes into making an electronic song. You need to know how to use synths and effects to your advantage. In the next post, I’ll be going over automations. Below is the progress that was made between this post and the last one. The full song will be done by the next post. We’re almost completely through the loop.

